
Tips on how to substitute transferring cable? This ain’t no simple feat, however we are breaking it down for you, fam. From vehicles to bikes, figuring out how those cables paintings and what to do once they cross kaput is vital. This information is your one-stop store for the whole thing you wish to have to find out about changing the ones necessary transferring cables.
Changing a transferring cable can appear daunting, however with the correct equipment and a step by step method, it is completely attainable. We will duvet the whole thing from the fundamentals of transferring cables to complicated troubleshooting tactics, making sure you are supplied to take on this restore like a professional.
Creation to Transferring Cables
Transferring cables are the necessary conduits that hyperlink your car’s gearbox to the tools selector, permitting you to easily transition between gears. From the zippy little sports activities automobile to the hulking lorry at the dual carriageway, those cables are a very powerful for the sleek operation of the transmission gadget. With out them, you are caught in one tools, doubtlessly inflicting a catastrophic mechanical failure.
They are a basic a part of the drivetrain, enabling the whole thing from subtle downshifts in a sports activities automobile to the robust tools adjustments in a truck.
Serve as of Transferring Cables
Transferring cables transmit the drive from the tools selector to the inner mechanisms of the gearbox. This permits the driving force to have interaction other gears, enabling the engine to paintings at optimal potency. The cable’s exact motion interprets to the right kind tools engagement inside the transmission. With out this a very powerful connection, your car would not be capable to alternate gears in any respect, rendering it pointless.
Trendy cars steadily use extra advanced techniques, however the fundamental idea stays the similar: a managed motion of the cable at once affects the transmission.
Indicators a Transferring Cable Wishes Substitute
A number of telltale indicators can point out that your transferring cable is on its ultimate legs. Tough or inconsistent tools adjustments are a not unusual symptom. You may in finding that gears are tricky to choose, or that they ‘catch’ or ‘skip’ right through transferring. A noticeable “clunk” or “grind” when transferring could be a transparent indicator of wear and tear and tear. It is because the cable could also be frayed or stretched, and no longer shifting the linkage correctly.
Some other symptom is a common lack of energy, which might stem from a subject with the transmission’s inside mechanisms being suffering from a malfunctioning cable.
Varieties of Transferring Cables
Other car sorts and producers make use of more than a few cable sorts, every with its personal benefits and downsides. The selection steadily relies on elements akin to price, sturdiness, and the precise necessities of the car’s transmission gadget.
| Cable Kind | Subject matter | Execs | Cons |
|---|---|---|---|
| Steel Cable | Metal or an identical steel alloys | Top tensile power, sturdy, steadily dependable in heavy-duty packages. | Will also be heavier, extra vulnerable to rust, and might require extra upkeep through the years. |
| Plastic Cable | Top-strength polymers | Light-weight, corrosion-resistant, usually decrease upkeep. | Decrease tensile power, could also be much less dependable in high-stress packages. Extra vulnerable to harm. |
This desk highlights the important thing variations between steel and plastic transferring cables, providing a snappy comparability in their homes. The selection between those fabrics is dependent closely at the particular software and the car’s running prerequisites.
Gear and Fabrics Wanted
Proper, so you are tryna substitute a transferring cable? First issues first, you wish to have the correct equipment. This ain’t rocket science, however you gotta have the correct equipment and fabrics to steer clear of any dramas. Unsuitable equipment can result in extra trouble and possible harm.
Very important Gear
This segment Artikels the necessary equipment wanted for a clean cable substitute. Having the correct equipment prevents pointless complications and guarantees a tidy activity.
| Software Identify | Description | Symbol Description |
|---|---|---|
| Cable Cutter | A specialized software for exactly reducing cables with out harmful them. Very important for taking away the outdated cable cleanly. | A hand held software with a pointy, angled blade, designed for cable reducing. |
| Cable Stripper | Used for taking away the outer jacket of the cable, exposing the interior wires for splicing. | A device with a collection of jaws or blades for gripping and stripping the cable jacket. |
| Screwdrivers (more than a few sizes) | Very important for adjusting or taking away parts associated with the transferring mechanism. | A collection of screwdrivers, together with Phillips and flathead sorts, in numerous sizes. |
| Pliers (needle-nose, slip-joint) | To hand for gripping small portions, adjusting cable clamps, or bending cable ends. | Two sorts of pliers: needle-nose for precision gripping and slip-joint for a much broader vary of jobs. |
| Cable Clamp Set | Guarantees the brand new cable is secured accurately to the transferring mechanism. | A collection of cable clamps, designed for securing the cable to more than a few parts. |
| Cable Finish Splicing Software | Supplies exact and neat splicing of cable ends for a safe connection. | A device with more than one blades and sections to verify right kind alignment and safe splicing of the cable ends. |
| Torque Wrench | Wanted for tightening bolts and screws with the correct amount of drive, combating harm or misalignment. | A device with a dial to measure torque and a care for for tightening parts. |
| Motorbike Stand | A robust stand to stay the motorcycle securely in position whilst operating on it. | A bicycle stand that gives a solid toughen for the motorcycle right through upkeep. |
Fabrics
Those fine details are similarly necessary for a clean restore. With out ’em, you are screwed.
- New Transferring Cable
- Cable Lubricant (motorcycle particular)
- Cable Clips (or cable ties)
- Cable finish ferrules (if wanted)
- Grease (if required)
Protection Tools
Protection first, proper? Those are very important for a protected and a hit restore. Ignoring those can result in damage.
- Paintings Gloves
- Protection Glasses/Eye Coverage
Step-by-Step Substitute Process

Proper, so you have got a dodgy transferring cable, eh? Changing it isn’t rocket science, however precision is vital. Apply those steps to get it taken care of. Call to mind it as a little of a mechanical puzzle, and you can nail it.
Taking out the Outdated Transferring Cable
Ahead of you get started tearing issues aside, remember to’ve were given the correct equipment and the brand new cable in a position. This segment Artikels the removing procedure. Carefulness is paramount to steer clear of harmful surrounding parts.
| Step | Description | Symbol Description |
|---|---|---|
| 1 | Find the cable access issues at the shifter and the derailleur. Establish any cable housing clamps or fasteners. | An in depth-up view of the derailleur and shifter, highlighting the cable access issues and any visual cable housing clamps. |
| 2 | Sparsely loosen and take away any cable housing clamps or fasteners. Use the suitable equipment, like pliers or a cable housing clamp remover. | The similar view as step 1, however now appearing the equipment getting used to take away the cable housing clamps. Pliers or a cable housing clamp remover are obviously visual. |
| 3 | Gently pull the outdated cable out of the housing, operating from the shifter finish first. Remember of any possible kinks or bends within the cable. | A view of the cable housing, appearing the outdated cable being sparsely extracted from the housing. Any bends or kinks are highlighted. |
| 4 | As soon as the cable is totally got rid of, sparsely disconnect any cable finish caps or ferrules. | An in depth-up of the cable ends, appearing the tip caps or ferrules being sparsely disconnected from the cable. |
Examining the Outdated Cable
A snappy visible test can prevent a large number of trouble. Search for obtrusive harm like cuts, kinks, or fraying. If it has got a historical past of issues, you could wish to imagine upgrading to a extra tough cable.
- Visible inspection: Take a look at the cable for any indicators of wear and tear, together with cuts, kinks, or fraying. A broken cable will most likely want substitute, regardless of how minor the problem turns out.
- Capability evaluate: Does the cable really feel stiff or gradual? Is there any noticeable friction when pulling it? A stiff or gradual cable will want substitute, as this means possible inside put on.
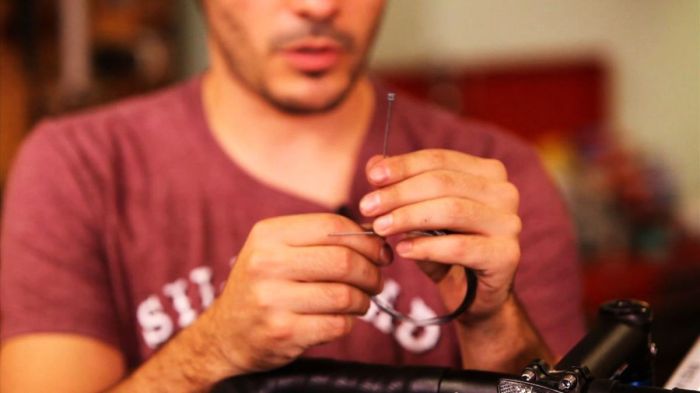
Putting in the New Transferring Cable, Tips on how to substitute transferring cable
Now, let’s get the brand new cable put in. That is in large part the opposite of the removing procedure. Take note of the right kind routing for optimum transferring efficiency.
- Thread the brand new cable during the housing, making sure it is clean and freed from kinks. The cable must waft simply.
- Sparsely re-attach the cable finish caps or ferrules to the cable ends, making sure a safe are compatible. Tighten the ferrules as it should be to forestall harm.
- Course the brand new cable during the housing, ensuring it aligns with the unique trail. This may ensure that clean transferring.
- Reinstall the cable housing clamps or fasteners, making sure they’re correctly tightened. That is essential for cable steadiness and longevity.
Trying out the New Cable
Now, time to check your handiwork. Ensure that the brand new cable shifts easily and successfully thru all the vary of gears. This ultimate step is very important to verify a right kind substitute.
- Tools transferring: Take a look at the transferring serve as throughout all gears to substantiate clean and exact transitions. Any problems must be addressed straight away.
- Friction test: Assess for any friction or sticking issues right through transferring. If any problems are famous, re-route the cable or alter the housing for optimum efficiency.
- Sturdiness test: Give the cable a couple of check shifts through the years to make sure that it stays dependable and sturdy. This step offers you a transparent concept of its long-term efficiency.
Troubleshooting Commonplace Problems
Proper, so you have got your transferring cables taken care of, however issues can cross pear-shaped. Understanding the prospective pitfalls and the right way to repair ’em is vital to a clean restore. This segment will duvet not unusual issues, their reasons, and the right way to diagnose and get to the bottom of them.Working out the prospective hiccups right through the cable substitute procedure can prevent a ton of time and frustration.
By means of expecting conceivable problems, you’ll be able to briefly establish and cope with them, warding off a whole rebuild. Right kind troubleshooting is a very powerful for a a hit restore.
Possible Issues Right through Substitute
Commonplace problems right through transferring cable substitute come with mistaken cable routing, broken housing, or seizing cables. Right kind cable routing is paramount to verify clean transferring motion.
- Fallacious Cable Routing: Unsuitable routing can result in cable binding or interference with different parts. It will purpose the cable to rub in opposition to portions of the motorcycle, or kink. This ends up in a coarse, clunky transferring enjoy. Double-check the routing diagrams, or ask a mate who is aware of their motorcycles in and out. Proper routing guarantees the cable runs easily thru its designated trail.
- Broken Housing: A broken cable housing could cause friction, resulting in stiff transferring or cable breakage. Take a look at for cracks, tears, or any indicators of wear and tear and tear. Changing the housing or cable itself may well be wanted, relying at the extent of the wear and tear. Changing the housing prevents additional harm.
- Seized Cables: If the cables are seized, they would possibly not transfer easily during the housing. This can also be led to via corrosion, or simply undeniable overlook. Lubricating the cables and housing with a right kind lubricant, like motorcycle cable lube, can steadily get to the bottom of this downside. Ensure that the cable is lubricated all the way through all the duration of the cable.
Commonplace Reasons of Transferring Cable Failure
Cable failure can stem from more than a few elements, together with put on and tear, corrosion, or incorrect lubrication. Those elements give a contribution to a less-than-ideal transferring enjoy.
- Put on and Tear: Through the years, the cables and housing put on out, resulting in higher friction and stiffness. Common upkeep and substitute are necessary to stay the transferring gadget in tip-top form. Regimen exams for put on are a very powerful for longevity.
- Corrosion: Moisture and environmental elements could cause corrosion, which will grasp the cables and lead them to much less efficient. Protective the cables from moisture can save you this factor. Imagine the use of a water resistant casing if the surroundings is especially harsh.
- Unsuitable Lubrication: Inadequate or mistaken lubrication can result in cable sticking and binding. The usage of the correct lubricant for the cable kind is very important. The proper lubricant guarantees clean transferring. Opting for the improper lubricant could cause issues down the road.
Troubleshooting Desk
This desk summarizes possible problems, their reasons, and corresponding answers.
| Factor | Purpose | Treatment |
|---|---|---|
| Stiff Transferring | Fallacious routing, broken housing, seized cables, or put on and tear | Take a look at routing, substitute housing, lubricate cables, or substitute cables. |
| Cable Breakage | Over the top strain at the cable, sharp bends, or broken housing | Check up on for strain issues, ensure that clean bends, substitute broken housing, or use strengthened cable. |
| Tough Transferring | Seized cables, corrosion, incorrect lubrication, or put on and tear | Lubricate cables, use a cable lubricant, substitute cables, or blank the cable housing. |
Automobile Explicit Transferring Cable Replacements
Proper, so we now have lined the fundamentals, now let’s drill down into the specifics for various cars. Understanding the nuances of every platform is a very powerful for a clean switch. Other cars have other cable routing, get admission to issues, and equipment wanted, so nailing the correct process is vital to steer clear of any nasty surprises.
Automotive Transferring Cable Substitute
This process assumes a normal automobile setup with a cable-operated guide transmission. First, you can wish to safely toughen the car the use of jack stands. Then, find the cable’s get admission to level, most often in the back of the transmission or underneath the dashboard. Sparsely disconnect the cable from the transmission linkage and the shift lever. Use the correct equipment to take away any conserving clips or clamps.
Subsequent, check out the outdated cable for put on and tear. A worn cable would possibly want changing. Set up the brand new cable within the opposite order, making sure right kind alignment with the linkage and shift lever. Safe all connections, and decrease the car. Check the tools transferring serve as sooner than you log out.
Motorbike Transferring Cable Substitute
Motorbike transferring cables steadily require extra exact dealing with because of the compact nature of the gadget. Find the cable’s get admission to issues, most often hid underneath the engine or in the back of the handlebar. Improve the motorcycle the use of a strong stand. Disconnect the cable from the shifter and the transmission. Use small, exact equipment to unencumber any conserving clips.
Check up on the cable for harm. Set up the brand new cable within the opposite order, making sure the cable runs easily during the routing. Tighten all connections sparsely. Double-check that the shifter strikes freely thru all gears.
Truck Transferring Cable Substitute
Truck transferring cables are normally extra tough and complicated, steadily requiring specialised equipment and procedures. Make certain the truck is securely parked on a degree floor and supported via jack stands. Find the cable get admission to issues, which may well be underneath the cab or in the back of the transmission. Disconnect the cable from the transmission and the shift lever. Be aware the cable’s routing sparsely; vehicles continuously have intricate cable runs.
Check up on the outdated cable, noting any important put on. Set up the brand new cable within the opposite order, making sure proper routing. Tighten all connections firmly. Take a look at all the tools transferring vary sooner than you power.
Comparability Desk of Transferring Cable Substitute Procedures
| Automobile Kind | Get right of entry to Issues | Explicit Gear | Cable Routing | Possible Problems |
|---|---|---|---|---|
| Automotive | At the back of transmission/underneath dashboard | Screwdrivers, pliers, cable cutters | Fairly easy | Free connections, misalignment |
| Motorbike | Underneath engine/in the back of handlebar | Small screwdrivers, pliers, cable cutters | Compact routing, precision wanted | Bent cables, broken housings |
| Truck | Underneath cab/in the back of transmission | Wrench units, specialised equipment, pliers | Advanced routing, doubtlessly heavy cables | Broken sheaves, damaged linkages |
Keeping up Transferring Cables
Protecting your gearbox satisfied and your transferring clean calls for a little greater than only a slapdash substitute. Proactive upkeep is vital to warding off long term drama together with your transferring cables. Ignoring those easy steps may just result in pricey upkeep down the road, and albeit, a much less relaxing riding enjoy.
Preventive Upkeep Pointers
Common care is a very powerful for the longevity of your transferring cables. A well-maintained gadget interprets to much less put on and tear, leading to a smoother, extra responsive tools shift. Ignoring those easy steps may just result in untimely failure.
- Lubrication is Key: Common lubrication is necessary. Dry cables are vulnerable to seizing, resulting in stiffness and doubtlessly harmful the cable housing. Right kind lubrication guarantees clean operation and decreases friction, considerably extending the lifetime of the cable. The usage of the right kind lubricant, akin to a cable particular grease, is paramount. Steer clear of the use of generic lubricants, as they is probably not appropriate with the cable fabrics and may just also be unfavourable.
- Visible Inspection Frequency: Common exams are very important. Examining the cables for harm, kinks, or over the top put on must be part of your regimen. The frequency of those exams relies on using your car. Top-mileage or continuously used cars require extra widespread exams than the ones used much less steadily. A just right rule of thumb is to visually check out the cables a minimum of each and every 3000 miles, or after any important upkeep to the transmission.
Lubrication Process
Proper lubrication tactics are essential for optimum cable efficiency. Unsuitable lubrication can result in problems with cable operation, together with binding or breakage. The usage of the right kind equipment is a very powerful to forestall harm.
- Accumulate Provides: Be sure to have the right kind lubricant to your particular cable kind. This isn’t a DIY activity; seek the advice of your car’s guide for the advisable lubricant. You’ll be able to additionally want a lubricant applicator, or a small tube of grease, relying at the design of the cable. A small, blank rag could also be helpful.
- Get right of entry to the Cable: Sparsely find the get admission to issues for the transferring cables. You may wish to take away some panels or covers. Your car’s guide must element those get admission to issues. Take care to not harm another parts whilst getting access to the cable.
- Practice Lubricant: Practice a small quantity of lubricant alongside the duration of the cable, specializing in the spaces vulnerable to friction or put on. Steer clear of over-lubricating, as extra lubricant can draw in filth and particles, doubtlessly inflicting extra hurt than just right. Practice a skinny, even coating to the cable and its housing.
Fundamental Cable Inspection Process
An intensive visible inspection can establish possible issues sooner than they escalate. Early detection can save you pricey upkeep and make sure your transmission purposes successfully.
- Visible Exam: Check up on the cable for any visual harm, akin to kinks, cracks, or tears. Search for indicators of over the top put on or corrosion at the cable and its housing. Pay shut consideration to the spaces the place the cable connects to the transmission and the steerage column. Those are not unusual issues of strain and failure.
- Capability Take a look at: Perform the tools shift lever to test for clean and constant motion. Any peculiar resistance, binding, or noise warrants additional investigation. A clean, constant shift trend is indicative of a wholesome cable.
- Housing Integrity: Check up on the cable housing for any indicators of wear and tear or deterioration. Search for cracks, bulges, or any spaces the place the housing seems weakened. A compromised housing may just result in cable failure.
Protection Precautions: How To Substitute Transferring Cable
Changing transferring cables could be a little bit of a faff, however with the correct precautions, it is completely manageable. Following protection protocols is a very powerful, combating possible hazards and retaining you protected from hurt. Failing to take action may just result in accidents and doubtlessly harm to the car.Right kind protection procedures are paramount to steer clear of injuries and make sure a clean and a hit substitute procedure.
This comes to figuring out the significance of every step, from disconnecting the battery to operating safely underneath the car.
Battery Disconnection
Making sure the battery is disconnected sooner than beginning any paintings is a basic protection measure. This prevents the danger of unintended electric shocks, which might result in critical accidents. Failure to disconnect the battery can lead to electrical shocks, quick circuits, or different electric hazards.
- Find the detrimental (-) terminal of the battery.
- Use an acceptable wrench to disconnect the detrimental (-) terminal cable from the battery terminal. All the time use the right kind dimension wrench for the activity to steer clear of harmful the cable or the battery terminal.
- Disconnect the sure (+) terminal cable from the battery terminal in a an identical method, the use of an acceptable wrench.
Operating Safely on Automobiles
Operating safely on a car comes to a number of key procedures. Those precautions assist mitigate dangers related to operating in confined areas or with doubtlessly hazardous fabrics.
- Make certain the car is securely parked on a degree floor and supported via suitable stands or jack stands. This is very important for combating the car from shifting swiftly right through the restore procedure.
- Put on suitable private protecting apparatus (PPE), akin to protection glasses, gloves, and closed-toe sneakers. This is helping give protection to you from possible hazards like flying particles, sharp edges, or chemical compounds.
- Use good enough lights to strengthen visibility within the workspace. Deficient lights can result in injuries, so making sure enough lights is necessary, particularly when operating underneath the car.
- Have a good friend gadget in position, particularly when operating underneath the car. A 2nd pair of eyes can assist save you injuries, like a car losing from the jack or equipment falling.
Operating Underneath the Automobile
Operating underneath a car calls for particular precautions because of the increased chance of falling items and possible car motion. Those precautions are a very powerful to steer clear of critical damage.
- Place the car securely on jack stands, making sure they’re accurately located and solid. Make certain that the stands are rated for the load of the car and correctly positioned.
- Use suitable protection tools when operating underneath the car, together with gloves, protection glasses, and durable shoes. This may assist give protection to you from possible hazards.
- Handle transparent visibility and good enough lights to steer clear of injuries because of obstructed imaginative and prescient. That is essential for protection when operating underneath the car.
- Be wary when shifting round underneath the car. Be sure to have a transparent trail and steer clear of obstructions that would purpose you to shuttle or fall.
Ultimate Conclusion
So, there you’ve gotten it – a complete information to changing your transferring cable. Now you are prepared to take on any transferring cable problems that come your manner. Take note to prioritize protection and apply the stairs sparsely. If you are nonetheless feeling a little misplaced, hit up the FAQs underneath for additonal assist. Just right good fortune, and satisfied wrenching!
FAQ
Q: What are some not unusual indicators that my transferring cable wishes changing?
A: Laborious transferring, clunky tools adjustments, or a whole loss of tools transferring are all main pink flags. You may additionally realize a ordinary noise or really feel a resistance when transferring.
Q: What sort of equipment do I wish to substitute a transferring cable?
A: You’ll be able to want a wrench set, pliers, a screwdriver, and most likely some specialised equipment relying to your car. A torque wrench could also be a good suggestion.
Q: How steadily must I lubricate my transferring cables?
A: Common lubrication, like each and every few thousand miles or so, relying to your car’s guide, is helping save you put on and tear and guarantees clean transferring.
Q: What if I will’t get the cable out?
A: Every now and then the cable is caught or seized. Check out the use of penetrating oil or a lubricant to assist loosen it. If that does not paintings, you could wish to use extra drive, however continue sparsely to steer clear of harm.
